Title here
Summary here
Edit Mode lets you make changes to individual elements of your AI-generated project. Select an element directly on your project, then use the chat panel or built-in styling options to apply your changes. The rest of your project remains the same.
Edit Mode works best for targeted, element-level changes. Common uses include:
AI project generation and direct editing work best together:
To enter Edit Mode, click Edit in the top navigation bar. In Edit Mode, the style panel displays options to edit the element you select.
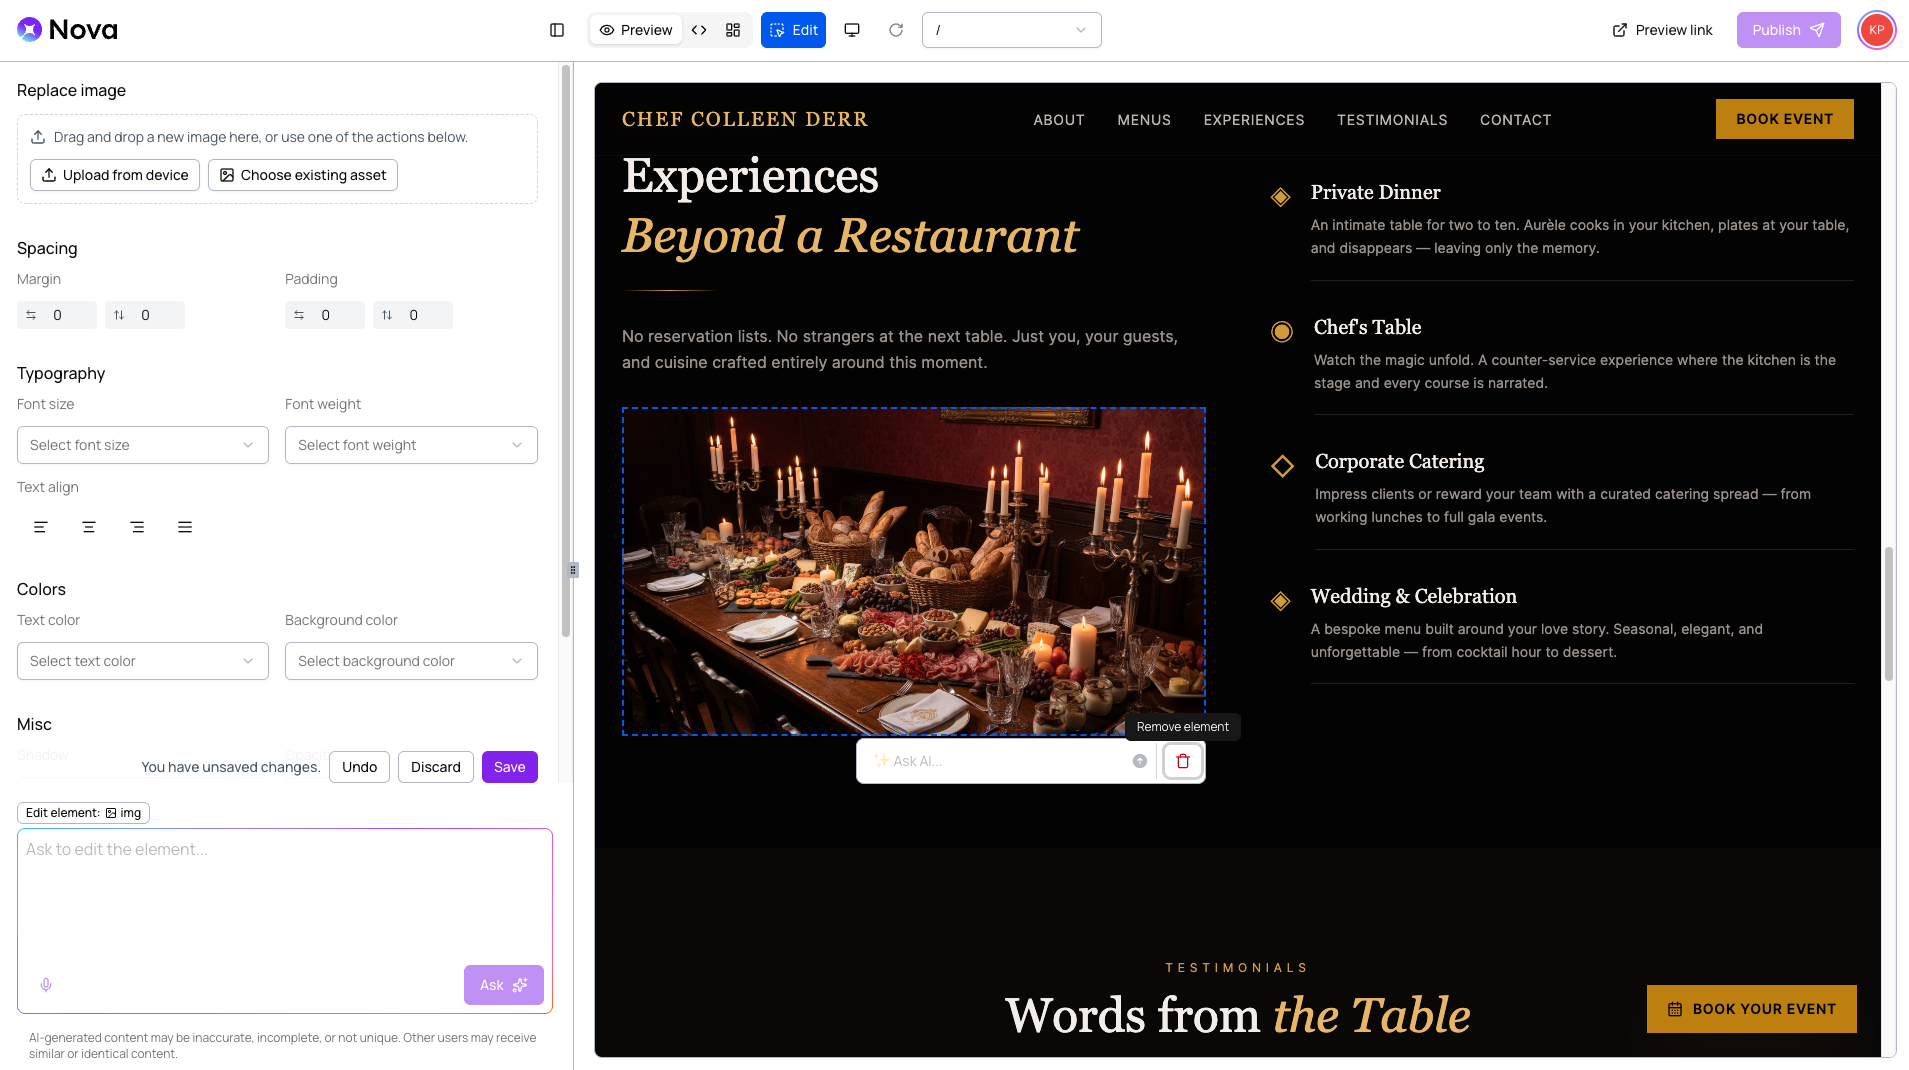
The style panel changes depending on the element you select.
Click an element that you want to change in the project preview. Nova highlights the element with a blue border and a text box appears, allowing you to chat with Nova about that single element. The style panel shows additional editing options, if you want to update something manually.
You can also enter your prompt in the style panel text box, or click the microphone icon (
![]() ) to use
voice to text. Then, click Ask to apply your changes.
) to use
voice to text. Then, click Ask to apply your changes.
When you select an element, the style panel displays styling options for that element. You can adjust the following properties directly without using a prompt:
| Styling option | Properties | Applies to |
|---|---|---|
| Replace image | Uploaded image or existing asset | Images |
| Spacing | Margin and padding | All elements |
| Typography | Font size, font weight, and text alignment | Text, all elements |
| Colors | Text color and background color | Text, all elements |
| Misc | Shadow, opacity, and border radius | Text, all elements |
Select an image in the project preview. Then, choose how you want to add the replacement image:
To delete an element, select it and click the trash icon (
![]() ) to delete the element.
) to delete the element.
If your edits do not appear in the project preview after clicking Ask:
Nova applies each edit to the currently-selected element. If you send a follow-up prompt while selecting a different element, Nova may overwrite or ignore the earlier edit. Avoid making multiple rapid changes to overlapping elements. Select one element at a time and confirm each change before continuing. If you do not see your changes after switching between Edit Mode and Preview Mode, return to Edit Mode and reapply the edits. Nova does not automatically save mid-session changes.